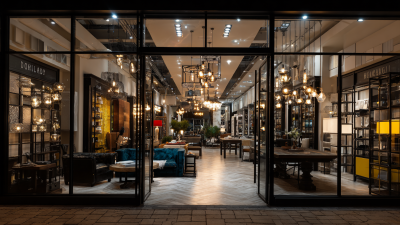
How to Choose the Best Shop Lighting for Your Store?
Choosing the best Shop Lighting for your store is not simply a matter of selecting the brightest fixtures. Light shapes how customers notice products, move through aisles, and judge the quality of your brand. A warm glow may make a boutique feel welcoming, while cooler light can support a clean, modern retail environment. The right decision depends on your merchandise, ceiling height, store layout, and customer experience.
Practical observation matters. Stand near the entrance and check whether customers can see displays clearly without facing harsh glare. Examine how lighting affects fabric colors, packaging details, and skin tones in fitting rooms. High color rendering, controlled brightness, and balanced beam angles usually create a more trustworthy presentation. Energy efficiency also deserves attention, especially when lights operate for many hours each day. Professional lighting plans should consider electrical safety, local building requirements, maintenance access, and long-term operating costs.
No layout is perfect. A beautifully lit display may leave a darker aisle nearby. Too much brightness can feel tiring, not impressive. These details are easy to overlook during installation, so testing the lighting at different times is valuable. Ask staff for honest feedback. Watch customer movement. Then adjust.
This guide explains how to compare color temperature, brightness, fixture types, placement, and control systems. It also considers common mistakes, practical budgets, and future flexibility. With careful planning, Shop Lighting can support sales without overpowering the products themselves. The best result feels natural, even when every fixture has been carefully chosen.
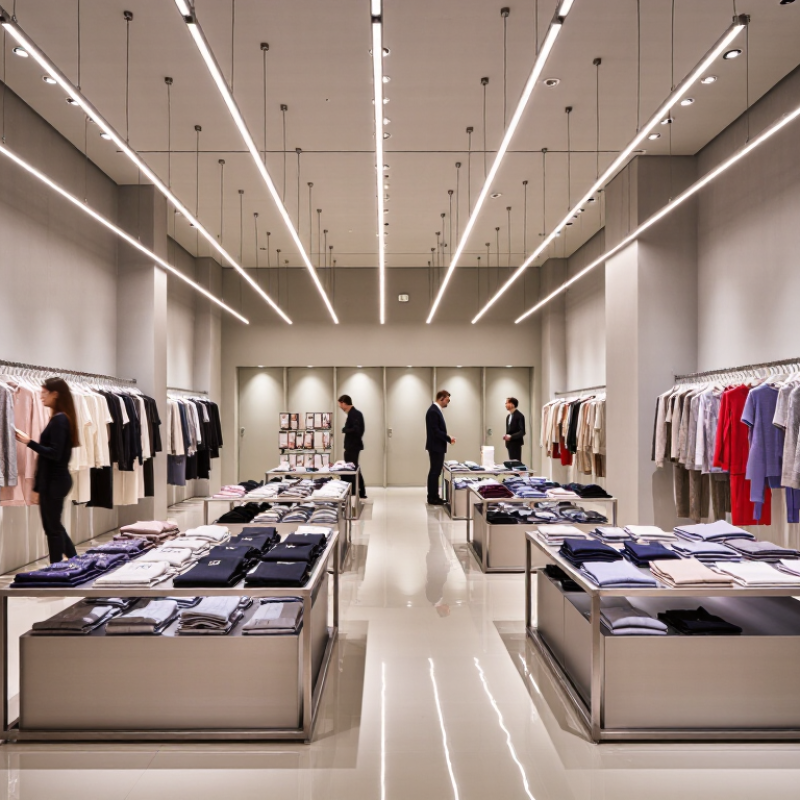
Define Your Store’s Lighting Needs and Customer Experience Goals
Choosing shop lighting begins with your store’s purpose, not fixture style. A grocery aisle needs accurate color and even visibility. A boutique may need warmer light and controlled contrast. Walk through the space during opening, midday, and evening hours. Note glare on glass, shadows under shelves, and dark corners near payment areas. Small details change how customers move.
The U.S. Department of Energy reports that LED lighting uses at least 75% less energy and can last up to 25 times longer than incandescent lighting. That matters when your store operates for ten hours daily. However, efficiency alone cannot define customer experience. The Illuminating Engineering Society recommends evaluating illuminance, color rendering, glare, and visual comfort together. Use high color rendering near clothing, food, or cosmetics. Keep brighter zones around new arrivals and important pathways. Softer levels can support browsing areas.
I once trusted a lighting plan that looked excellent on paper. It created harsh reflections on polished shelves. The plan was technically sound, but the shopping experience felt cold. That mistake taught me to test lighting with real products and real shoppers. Ask customers where they hesitate. Measure energy use after installation. Recheck the space after seasonal displays change. Retail lighting is never completely finished.
How to Choose the Best Shop Lighting for Your Store?
Define your store’s lighting needs and customer experience goals by assigning different illuminance levels to each area. Higher levels help attract attention to featured products, while balanced lighting supports comfort and easy navigation.
Typical planning targets are shown in lux (lx). General retail areas commonly use around 300–500 lx, feature displays may use approximately 750–1,500 lx, fitting rooms about 300–500 lx, checkout areas around 500–750 lx, and stockrooms around 150–300 lx. Final levels should be adjusted for layout, ceiling height, finishes, and customer comfort.
Compare Fixture Types, Color Temperatures, and Beam Angles
When I assess shop lighting, I compare fixture types before choosing brightness. Recessed downlights create a clean ceiling line and suit general illumination. Track lights offer flexibility for displays that change each season. Linear fixtures spread light across shelves and reduce dark gaps. Pendant fixtures can add character, but they may create glare above eye level. In a narrow aisle, poorly positioned pendants can feel intrusive.
Color temperature changes how customers perceive products. Warm light, around 2700K to 3000K, makes wood, leather, and cafés feel inviting. Neutral light, near 3500K to 4000K, often suits clothing, groceries, and mixed retail spaces. Cooler light can sharpen details, yet it may make a store feel clinical. I once selected a cooler setting for a display area, and the fabrics looked less comfortable. The specification seemed correct. The result was not.
Beam angle controls the size and intensity of the lighted area. Narrow beams, such as 15 to 24 degrees, highlight mannequins, artwork, or premium shelves. Medium beams around 25 to 40 degrees work well for focused product displays. Wide beams spread light across aisles and reduce harsh contrast. I check the mounting height, shelf depth, and customer viewing distance together. A narrow beam installed too high may create a bright spot without illuminating the product. That mistake is easy to miss on a plan. Test one fixture after opening hours, then inspect reflections on glass, packaging, and polished floors.
Plan Light Placement for Balanced and Functional Illumination
Good shop lighting begins with a placement plan, not a fixture catalogue. Map aisles, counters, shelves, fitting areas, and entrances before choosing output. Customers need clear faces, readable labels, and safe walking paths. I once installed too many downlights above a narrow aisle. The floor looked bright, but shelves cast hard shadows. That mistake changed how I assess illumination.
Use a layered arrangement. General light should guide movement without flattening every product. Add focused light over displays, checkout points, and feature tables. Keep beams away from eye level to reduce glare. Aim overlapping pools of light, especially near corners and tall shelving. A lux meter can reveal uneven areas that photographs often hide. Check surfaces at standing height, not only from a ceiling plan.
Balance also depends on color appearance, ceiling height, wall reflectance, and daylight. A bright window may make nearby fixtures seem weak during afternoon hours. Test the layout at opening, midday, and evening. Dimming controls help, but they cannot repair poor spacing. Leave service access around fittings and review shadows after shelves are stocked. Some areas may still feel slightly uneven. That is a useful warning, not a design failure. Revise the plan before adding more power.
How to Choose the Best Shop Lighting for Your Store? - Plan Light Placement for Balanced and Functional Illumination
| Store Area | Primary Lighting Goal | Recommended Illuminance | Suitable Fixture Type | Color Temperature | Placement Guidance | Key Performance Considerations |
|---|---|---|---|---|---|---|
| Entrance and Window Display | Create an inviting first impression and draw attention to featured products. | Approximately 500–1,000 lux on display surfaces, depending on ambient daylight. | Adjustable spotlights, track lights, or recessed accent fixtures. | 3,000–4,000 K for a welcoming appearance. | Aim light at merchandise rather than directly toward customers or the storefront glass. | Use glare shields and high color rendering to keep products visually accurate. |
| Main Sales Floor | Provide comfortable, even illumination for navigation and general shopping. | Approximately 300–750 lux on the floor and merchandise areas. | Linear LED fixtures, panel lights, or evenly spaced track lighting. | 3,000–4,000 K, selected to match the store’s atmosphere. | Arrange fixtures in a regular grid and overlap beam patterns to reduce dark spots. | Maintain consistent brightness and avoid excessive contrast between aisles. |
| Shelves and Wall Displays | Make packaging, labels, and products easy to see from different viewing angles. | Approximately 500–1,000 lux on vertical surfaces. | Vertical wall washers, shelf-integrated linear lights, or adjustable track heads. | 3,500–4,000 K for clear product visibility. | Position the light source slightly in front of the shelving to minimize shadows from upper shelves. | Select a beam angle appropriate to shelf depth and use low-glare optics. |
| Feature or Promotional Displays | Create visual hierarchy and direct attention to priority merchandise. | Approximately 750–1,500 lux, or about 1.5–3 times the surrounding level. | Narrow- or medium-beam adjustable spotlights. | 3,000–4,000 K, coordinated with the ambient lighting. | Aim beams at the product surface at approximately a 30-degree angle to limit reflected glare. | Use high color rendering, especially for clothing, cosmetics, food, and artwork. |
| Fitting Rooms | Provide flattering but accurate light for evaluating color, texture, and fit. | Approximately 300–500 lux, with balanced vertical illumination. | Diffused ceiling fixtures combined with vertical side lighting. | 3,000–3,500 K for a comfortable, natural appearance. | Light the face and body from more than one direction to reduce harsh shadows. | Prefer diffused optics and a high color rendering index; avoid exposed bright sources. |
| Checkout Counter | Support accurate payment handling, product inspection, and queue visibility. | Approximately 500–750 lux on the counter surface. | Recessed linear fixtures or low-glare suspended lighting. | 3,000–4,000 K. | Place fixtures so staff do not cast shadows over the work surface. | Control reflections on screens and glossy counter materials. |
| Aisles and Circulation Paths | Make movement safe and intuitive while maintaining visual comfort. | Approximately 200–500 lux, subject to local safety requirements. | Uniform linear lighting, recessed fixtures, or wide-beam track lights. | 3,000–4,000 K. | Align fixtures with the direction of travel and maintain regular spacing. | Avoid abrupt changes in brightness and keep emergency routes unobstructed. |
| Stockroom and Service Areas | Support reading labels, finding inventory, and carrying out routine tasks safely. | Approximately 200–500 lux on work surfaces and storage aisles. | Efficient linear LED battens, strip fixtures, or sealed task lights. | 3,500–4,000 K for clear visual detail. | Space fixtures between storage rows or above work surfaces to limit shadowing. | Use durable, easy-to-maintain fixtures and follow applicable workplace safety rules. |
Evaluate Energy Efficiency, Controls, Maintenance, and Costs
How to Choose the Best Shop Lighting for Your Store?
Energy efficiency should be measured against operating hours, not fixture price alone. The U.S. Department of Energy reports that LED lighting uses at least 75% less energy than incandescent lighting and can last up to 25 times longer. For a shop open twelve hours daily, that difference quickly affects electricity bills and replacement labor. Check lumens, watts, color quality, and expected life. Bright is not always better. Excessive brightness can create glare on glass counters and polished floors.
Controls can reduce waste when they match customer movement. Occupancy sensors suit stockrooms and staff areas, while daylight dimming works near windows. The International Energy Agency identifies efficient lighting and controls as important parts of building energy savings. Ask for measured savings, not attractive estimates. Maintenance also matters. Choose accessible drivers, standard components, and clear warranty terms. A small failure should not require closing an entire aisle. Cost calculations should include installation, cleaning, lamp replacement, energy use, and disposal. Perfect forecasting is rare. Recheck assumptions after one season.
Tips: Compare three years of total ownership cost. Test lighting at opening and closing hours. Record failed units and repair time. Review the plan after thirty days; real shopper behavior may challenge the original design.
Test the Lighting Layout and Refine It Before Installation
Choosing the best shop lighting starts with testing the layout before installation. A drawing may look balanced, yet the finished space can feel harsh or dull. Place temporary lights at the planned ceiling positions. Use the same mounting height and beam direction whenever possible. Walk through the store as a customer would. Notice dark corners, reflected glare, and distracting shadows on products.
Check key areas separately. Shelves need even light across the product faces, while display tables may need stronger accents. Measure light levels with a handheld meter, but do not trust numbers alone. Your eyes reveal discomfort that a meter cannot.
Look at fabric, packaging, and skin tones under the proposed colour temperature. Take photos from the entrance and from busy aisles. Review them later. The camera often exposes uneven brightness.
Refine the plan after real observation. Move one fitting slightly, narrow a beam, or reduce brightness near reflective surfaces. Ask staff where they notice eye strain during a normal shift. Ask several people, not just one person. Their feedback may challenge your original design. I have seen attractive layouts fail because a bright fitting reflected directly into the checkout screen. That mistake was preventable. Test during daytime and evening conditions, since window light changes the balance. A qualified electrician should confirm load capacity, wiring safety, and compliance before permanent installation.
Related Posts
-
What are the Key Features of the Best Shop Lighting for Global Retailers?
-
How to Choose Industrial LED Lighting for Global Projects
-
Maximizing Return on Investment with LED Light Panels through Superior Support and Cost Efficient Repairs
-
5 Key Advantages of LED Lighting Solutions for Global Buyers in 2023
-
7 Reasons Why Best Exterior Led Lighting is Essential for Sustainable Urban Development
-
Mastering the Installation of Best Exterior Led Lighting for Your Home